Tips & Tricks
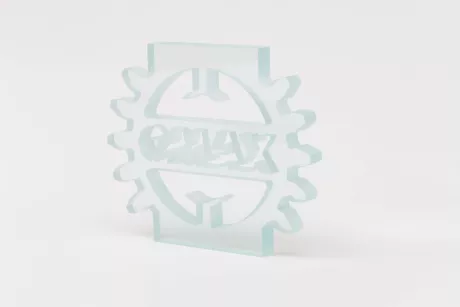
Cutting Glass on a Waterjet Machine

Although most glass should cut well on your waterjet, you will need to make exceptions, as different kinds of glass behave differently. For example, piercing is an easy but challenging part of waterjet glass cutting. In addition, frosting and chipping may occur around cut edges.
Note that you can cut glass on all OMAX waterjets, from our small waterjet, the ProtoMAX, all the way up to a large-form OMAX 160X.
Do not attempt to machine tempered glass, as it will shatter.
Tips to pierce glass on a waterjet
- Avoid piercing whenever possible, as this is when glass is most likely to crack. If possible, come in from the edge of the material, allowing the jet to start and stabilize before it reaches the material.
- Use the OMAX Vacuum Assist Accessory to pierce glass. The Vacuum Assist Accessory makes a great improvement in the reliability of all kinds of piercing that may otherwise break, crack, or de-laminate the glass.
- Pierce at low pressure to avoid cracking. Use the lowest pressure that your pump can produce while still creating enough vacuum to pull the abrasive into the nozzle without plugging the nozzle (typically 10,000 to 15,000 psi [69000 to 100,000 kPa]). Be sure to turn on "Brittle Mode" in the Change Path Setup dialog box.
- When you use the MaxJet 5 nozzle, plug the vent hole to create additional vacuum pressure at low pump pressures. This will reduce the life of the jewel slightly, so plug the hole when necessary.
- A flat and uniform support for the material is essential to avoid cracking. The Waterjet Brick works well for cutting glass.
- Use long lead-ins so if the material does crack, the crack is less likely to ruin the part. When you check "Very Brittle Mode," the length of lead-ins is not automatically adjusted for a dynamic pierce, so the length in your drawing is the length that is used.
- Adjust the Low Pressure setting for "Delay after nozzle fires before abrasive turns on" to a very low value, close to zero seconds. You may even consider entering a negative value in some cases.
Tips to avoid frosting and chipping on a waterjet
- Frosting occurs where stray abrasive strikes the cut material, abrading the surface. Micro-chipping can occur along the edges of glass where small chips of material are removed.
- Use a finer mesh abrasive to avoid chipping around the edges. Use 120 mesh garnet at a flow rate of about 0.4 lbs (0.2 kg) per minute.
- If excess chipping occurs around the edges of the glass, choose the material "Glass: ExtraBrittle" in MAKE’s Path Setup, which will slow the cutting process to help avoid this.
- Cut under water to minimize frosting.
- To reduce the amount of chipping on the underside of the part, use a lower machinability to slow the glass cutting down even more than otherwise necessary.
- Cut on top of Waterjet Brick or a sacrificial material to avoid frosting the back side of the glass with slat splash-back. Likewise, you may wish to add some protection on the top side such as a thick sheet of wood or metal. Often glass comes with a paper protective coating. Leave this coating on the glass until after it has finished being cut.
- Avoid the risk of spray-back from slat deflection as much as possible. If the precautions are not taken to avoid spray-back, the glass piece can be frosted or broken outright because of the spray pressure from the deflection. Use something like JetBrick or firm, thick, foam board that allows the jet to travel through and help minimize the spray-back effect if the waterjet steam comes in contact with a slat. Also, leave as few metal slats as possible under the work-piece.


